

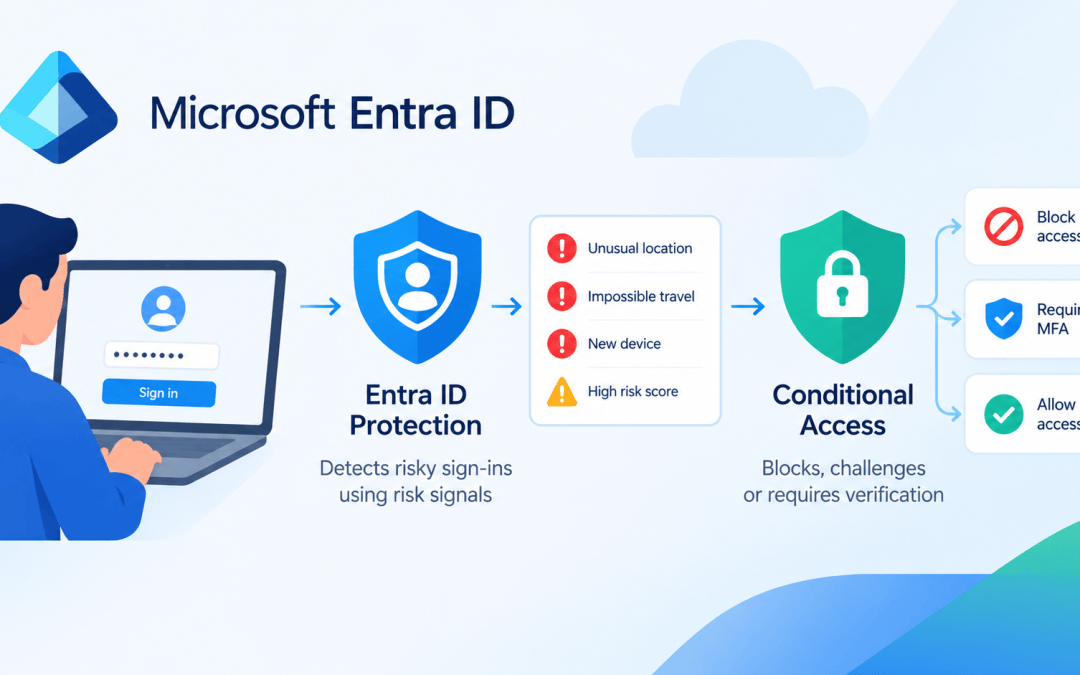
Let’s demo it!
How would an admin handle this?
Sign in to the Microsoft Entra admin center.
Navigate to ID Protection -> Risky users -> Report -> Risky sign-ins

Look at the risk details, such as the user, risk state, detection type, and sign-in information. Verify any suspicious activity before deciding whether the sign-in is legitimate.

Confirm sign-in(s) compromised: An admin confirmed that Lee Gu’s sign-in was malicious. Entra ID Protection marked the account as “Confirmed Compromised” and raised the risk level to high, which can trigger Conditional Access policies.

Confirm sign-in(s) safe: An admin checked Adele Vance’s sign-in and confirmed it was legitimate. As a result, Entra ID Protection labeled it as “Confirmed safe” and removed the associated risk.

But how can we be proactive and add yet another layer of protection for the body? Then the answer comes down to three words: Conditional Access Policy (CAP)
Navigate to ID Protection -> Risk-based Conditional Access -> Policies
At this point, through the MS Entra portal, you can create a new policy from scratch or from a template, and last but not least, upload a custom policy JSON file.

Tap the New policy from template button, and from the Zero Trust section, choose the template “Require multifactor authentication for risky sign-ins,” and click on the button Review + create.

One step before you create the CA policy, you can rename it and choose the policy state. On most occasions, it is suggested to use the Report-only option to ingest some logs and check the impact before turning on the policy.

Although this is a template, you can always make changes and amend the policy assignments. The screenshot below shows the options an admin has to update and tailor the policy to their organization’s specific cases and needs.
Users: In this section, you can select which users or groups to include or exclude from the policy. For the sake of the example, you can add all the users listed in the screenshots above the article, or the groups they belong to.

Target resources: In the Target resources section, select the applications that you want the policy to protect.

Network: In the Network section, define which IP ranges, countries, or compliant locations to include or exclude for location-based access decisions.

Conditions: In the Conditions section, you can set policies based on user risk, sign-in risk, and device details.

Acccess controls – Grant: In the Access controls – Grant section, you can block or allow access based on requirements such as MFA, authentication strength, compliance, hybrid-joined devices, approved apps, or acceptance of the terms of use.

Acccess controls – Session: In the Access Controls – Session section, you can manage the sign-in experience, including sign-in frequency, persistent sessions, app restrictions, and access control for Defender for Cloud Apps.

After you test the policy, enable it and watch for any unexpected sign-in issues. Do not create risky activities on real accounts just for testing; use a test environment and follow Microsoft’s recommendations.
And for the end… Best practices:
- Give users only the access they need, and apply stronger protections for admin accounts.
- Keep emergency access accounts out of policies that could lock all admin accounts. Monitor these accounts separately.
- Use Report-only mode to test changes before enforcing them.
- Check for risk detections regularly and follow your organization’s steps to investigate and resolve any compromised accounts.
- Confirm you have the correct Microsoft Entra ID license before setting up risk-based policies.